- Tuesday December 5, 2023
- Tuesday December 5, 2023
-
The power of flow
Thursday October 12, 2023Ever wondered how to stay enthusiastic about your startup. Here is a great insight:
When you focus on the process, the desired product takes care of itself with fluid ease. When you focus on the product, you immediately begin to fight yourself and experience boredom, restlessness, frustration, and impatience with the process.
-
On marketing
Wednesday October 11, 2023A great advice, especially for entrepreneurs:
“if you play the other fella’s game, you will always lose. Stick with your focus on quality. Quality makes you different. Quality will always win in the end.’”” (Mark W. Schaefer, Cumulative Advantage)
-
A remarkable life
Tuesday October 10, 2023Charles Feeney lived a remarkable life and deserves to be written about. Despite making billions of dollars he remained humble and understood that his wealth was nothing without society. Respectfully, understanding this law, he invested back into society.
There are multiple lessons to be learned from his life and well worth your time.
-
Sunday October 1, 2023
10 more minutes until 1 pm and you know what that means on a Sunday…. #nflredzone
-
Wednesday September 13, 2023
As I’m always looking for a great code editor I remembered that Jetbrains has this new Fleet thing out. It looks promising, starts fast (I hate Java apps), but then looking at the memory usage and I’m out of here…

-
Wednesday September 6, 2023
It’s about time. As of now, Siri is a total disgrace and hardly usable (that goes for Goggle Assistant as well) but we expect better from #Apple
-
Tuesday September 5, 2023
This is an interesting take on Google ads and surely works for B2C. Not sure if it’s applicable to B2B as this would just be Enterprise sales (which comes with a much longer sales cycle)
Spend Your Ad Budget on This Demographic to Triple Your Profits | Entrepreneur
-
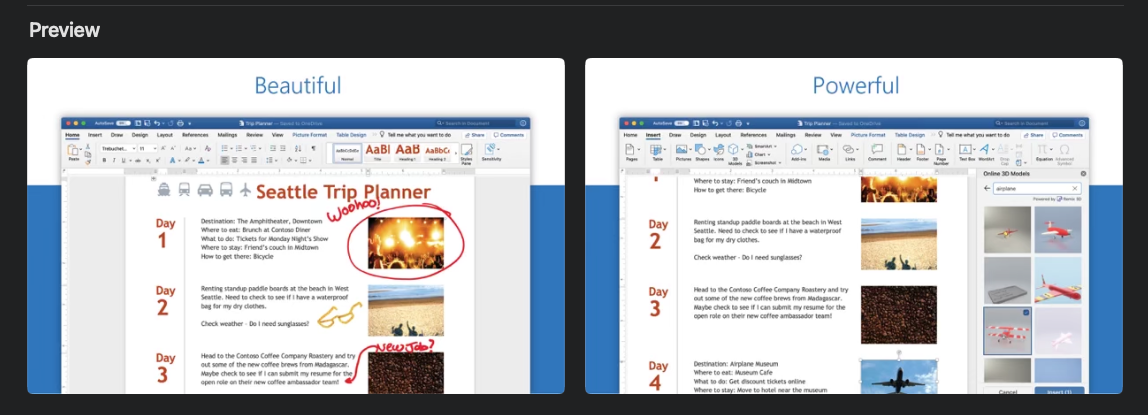
Tuesday September 5, 2023
To be honest, when I think of MS Word, the words “beautiful” and “powerful” don’t immediately come to mind.
-
Sunday September 3, 2023
“Practical knowledge is the ultimate commodity, and is what will pay you dividends for decades to come—far more than the paltry increase in pay you might receive at some seemingly lucrative position that offers fewer learning opportunities.” (Robert Greene, Mastery)
-
Sunday September 3, 2023
“Consistency is more important than genius.” (Mark W. Schaefer, Cumulative Advantage)
-
Thursday August 31, 2023
Have you ever wondered how to master email and customer relationships better? This blog post might have the answers: Mastering Email CRM: The Ultimate Guide to Boosting Your Customer Relationships
-
Thursday August 31, 2023
There is no growth without momentum. There is no momentum without discipline. (Mark W. Schaefer, Cumulative Advantage)
-
Wednesday August 30, 2023
Remember this the next time you want to support some political agenda (and you love your privacy).
-
10 Best Photo Manager Software Options
Tuesday August 29, 2023Here is another one of my favorite comparisons. This time about Photo Management Software.
Photo management software is a program or app that lets you manage your digital brand assets. Digital assets for a business refer to any online files or content that hold value and contribute to the brand’s identity, marketing efforts, or overall operations. They can include images, photos, videos, logos, design files, documents, etc.
But having a lot of digital assets can also be challenging. You need to store them somewhere safe and secure, organize them to find them easily, edit them if you need to make changes, and share them with the right people at the right time.
The post is available on the Razuna blog.
-
What Are The Customer Engagement Metrics Your Team Should Track?
Tuesday August 29, 2023It’s so important for your business to track its customer engagement metrics. Doing so helps you determine the success of your sales, marketing, and customer service efforts.
Customer engagement metrics measure how customers interact with your brand, and it’s a great way to gauge their overall experience. By understanding which activities drive more engagement, you can focus and optimize your sales, marketing, and customer service strategies for maximum reach and impact.
Please find the whole post here.
-
Tuesday August 29, 2023
Dear Customer,
I refuse to reply and include the 20 people on CC. This CC mentality is a disease and should be forbidden. Besides, we have tools nowadays that make emailing for teams much easier (hint: helpmonks.com).
Thank you.
-
Saturday August 26, 2023
So much to the once-great Wirecutter.
-
Friday August 25, 2023
We all deal with it daily but maybe we miss something to make it more efficient? What is an Email Thread & Best Practices to Manage It
-
Friday August 25, 2023
For everyone who has ever wondered. Just published Bitmap vs. Vector Graphics Explained For Content Creators
-
Friday August 25, 2023
This post has some great insight into boosting your energy.
-
Key to success
Thursday August 24, 2023Great quote from Mark Schaefer in his “Cumulative Advantage” book:
During your life, many doors will open. The key to success is recognizing the right time to open those doors and the right time to close them.
-
That's definitely the worst news for everyone.
Tuesday May 16, 2023That's definitely the worst news for everyone. I have no idea why Apple designers think that a mobile gesture should work on a desktop. It becomes messier each year:(
-
I cannot agree more.
Sunday April 23, 2023I cannot agree more. It started over three years ago or so when they started to bring in "small widgets" from iOS to macOS.
Since then and every time WWDC comes around (real soon again) I'm worried what atrocities they will introduce as "innovation" in the new macOS version.
I use macOS because it's the OS that allows me to access everything and every app without muss hassle.
But Apple, the company, has lost its way and is lead by someone who is good at counting numbers and organization. It took a while after Steve left, but that mentality has now sadly reached every department within Apple.